Roasted Dill and Garlic Red Potatoes

Posted by Jimmy | | Posted on 11:35 AM

0

Photo taken from http://www.foodchannel.com
One of my favorite side dishes is roasted dill and garlic red potatoes.  I know many places have this side dish (like Boston Market) but it just tastes so much better when you cook it the way you want it.  I had this side dish for my Christmas party and it was the first one to go!  I really should have made more.

Red potatoes have less starch content than big russet or Idaho potatoes so they're perfect for roasting.  Tip: If a potato says it's "waxy" means less starch content.  Waxy potatoes are great for roasting and making potato salads as they will not break apart so easily after they're cooked.  I found this great website that explains a little bit about different potatoes and their properties.  Check it out http://www.foodsubs.com/Potatoes.html

Here is my recipe:

2 lbs of New Red Potatoes cut into halves or quarters depending on how large the potatoes are
1/2 cup of chopped dill
1/4 cup of onions
2 tbsp of garlic
3 Tbsp Butter
Olive Oil
Salt and Pepper to taste

Directions: Prep the potatoes and season them with salt and pepper and coat with olive oil.  Roast in the oven at 400 degrees for 45 minutes or until fork tender.  In a saute pan melt the butter on medium-high heat when the butter is fully melted, add the garlic onions and dill and saute until the dill is wilted, do not overcook the dill, it should still have a bright green color.   Toss the potatoes and the dill mixture together and serve.   It is a delicious accompaniment to any meat or fish dish! 

Enjoy!
-Jimmy

In the land of Brussels...

Posted by Jimmy | | Posted on 10:25 AM

2

Photo taken from http://bebetterblog.tumblr.com/
Sprouts!!  


When it comes to veggies, I like to keep it simple K-I-S-S.  Asian style stir fry!   Some people like to add some kinda cured/salty/smoked pork product to help with the veggie, but I find that it just a way to mask the true flavors of the vegetables.   Truly, if you enjoy eating something you want the properties of whatever it is to shine. You never want to over complicate good food. 

In the case of Brussels sprouts, I find the mild bitterness and sweetness of the sprouts refreshing when paired with a strong gamey flavor of lamb.  To me, it's a perfect combination.   Combine that with a glass of Cabernet Sauvignon and it's heavenly.  It was a big hit at my Christmas party.  Here's my recipe for simple sprouts!

Brussel Sprouts, Halved
Chopped Garlic
Olive Oil
Kosher or Sea Salt


Directions:  heat a pot of water to boil and add some salt.  Blanche the sprouts for 1 minute.  While the sprouts are blanching, heat up 1 table spoon of olive oil on high heat in a saute pan.  When the oil is hot toss a table spoon of garlic like you would stir-fry.   Scoop out the sprouts with a net or a slotted spoon and add to the saute pan.  Add salt to taste and stir fry until you get slight caramelizing on the sprouts.   If you have a lot of sprouts make sure you stir fry in batches.   Crowding the pan will make caramelizing the sprouts difficult.  I would say at most half a pound of sprouts per batch.

The texture should still be slightly al dente in the middle and soft on the outside.  

Enjoy and stay cooking!

-Jimmy

Pictures of Christmas Food!

Posted by Jimmy | | Posted on 2:35 PM

0

My buddies Teshun and Jane Chan got me started on a tradition of having Lamb on special holidays like Christmas and Easter.   This year I made some lamb and seafood with the fixins!!   Enjoy the pictures!


What you are seeing from Left to right:   Roasted rosemary garlic leg of lamb with mushroom buerre rouge (Not pictured), oyster cornbread dressing, orange honey glazed carrots with a splash of brandy, seared sea scallops, chili lemon shrimp, boiled dungeness crab, Brussels sprouts sauteed with garlic and olive oil and roasted dill red potatoes.

I love holiday meals.  I love cooking for people and having people enjoy what I've created even more so than eating itself.   It just brings me such joy that i can bless others with a skill that God has given me.  Maybe one day I can cook for you? ;-)

Merry Cooking!
-Jimmy

It's a Seafood (and Lamb) Christmas!!

Posted by Jimmy | | Posted on 11:29 PM

4


Menu for Sunday:
Rosemary Roasted Leg of Lamb with Mushroom Burre Rouge.
Chili-Lemon Shrimp Saute
Seared Sea Scallops in a white wine garlic sauce
Boiled Dungeness Crab (delicious as is!)
Oyster Cornbread Dressing
Roasted Garlic-Dill New Potatoes
Brussels Sprouts sauteed in Garlic and Olive Oil
Honey-Orange Glazed Baby Carrots.
and …. White rice …. I’m so asian!  Haha

And Pupusas courtesy of our local salvadorean!

Hopefully I'll have pictures soon!

-Jimmy


Polish Christmas Ring!

Posted by Jimmy | Posted in , , , | Posted on 11:10 AM

2

Growing up in NY I got to live in many different places.  One of the places I found myself living (Before I moved to California) was in Melville, NY.  I stayed with the pastor of my church  Pastor Alan and Laurie Warren.  It really was an amazing time as I learned a lot from them.  Not as much as I should have but I still learned.

One of the traditions that the Warrens liked to do was making Polish Christmas Rings.  The week before Christmas Pastor Al would prepare the dough by hand and roll up the Christmas rings to share with close friends and family around him.  It was always a treat to be able to share in a family tradition.  He's been making it for 35 years and the recipe has been passed down and shared from generations.

This year I desired to share in the tradition and since they consider me an "adopted" son, they were happy to share the recipe with me.  Sorry guys I'm not allowed to publicly post the recipe.  I will tell you that it's a pastry dough made with sour cream filled with brown sugar and nuts and topped with a cream cheese frosting.  It is delicious and this is the season to be sharing and giving.  Fresh baked goods make great holiday gifts and is always appreciated. 

What are some of your family traditions?  Have you blessed anyone with your gift of baking?  I'd love to hear any of your stories!

Acts 20:35

New International Version (NIV)
35 In everything I did, I showed you that by this kind of hard work we must help the weak, remembering the words the Lord Jesus himself said: ‘It is more blessed to give than to receive.’

Stay Cooking!
-Jimmy

Where have I been?

Posted by Jimmy | | Posted on 10:31 AM

0

I haven't written here in a while.  I wonder who still reads this?   Doesn't matter who.  I'll just write.  

hi! =D 

So you think you can cook? July-Aug

Posted by Jimmy | | Posted on 11:21 AM

0

The First Competition is closed and in the books!!     And it looks like we have some amazing food out there!  Thank you to Lillian Huang Fuentes aka Sweets by Sillianah and Krista Ariellee Rodriguez aka Gypsy Got Soul and Kelle Bransfield Barth made Peanut Butter Chocolate Biscotti!

Just check out the amazing pictures!!


Black Bottom Peanut Butter Cup Ice Cream Cake Courtesy of Sweets By Sillianah
Seafood KareKare and Yema Peanut Candy Courtesy of Gypsy with Soul
Kelle's Peanut Butter and Chocolate Biscotti!


You can view both their blogs above!

As for me,  Here's what I made!

Peanut Crusted Chicken Breast with Sauted Broccoli Slaw
and a Chocolate Chili-Peanut Sauce
 Originally I was going to bake my chicken.  When I got home from the store, I thought I had eggs left.  Lo and Behold My Father ate all the eggs!!  So I couldn't make a proper breading.   So I just chopped the peanuts with my handy Food Chopper from pampered chef smashed down the peanuts into the chicken and Pan Fried them. 

Here's a list of ingredients for the Chocolate-Chili Peanut Sauce:


Chocolate-Chili sauce
1/4 Cup Chicken Broth, 1/4 Cup Heavy Cream, 1 Jalapeno, 2 Cloves of Garlic, 2 tbsp Onion, Salt, Pepper and 6 Xocai Nuggets.   I combined everything except the chocolate into a pan and set it to boil down for 15-20 minutes until everything is soft.   Add the mixture to a blender and put in the chocolate.  Blend until smooth.

Peanut sauce:
1/4 cup Peanut Butter, 1 tsp Rice Wine Vinegar, 1//2 tsp Sesame Oil, 1/2 tsp Onion Powder, 1/2 tsp Garlic Powder, 1 tbsp Soy Sauce, 1/4 cup Chicken broth.  Mix everything together Well till it becomes a nice dipping sauce.  That's it!  Just make sure everything is seasoned well!

I had a lot of fun with peanuts.  I hope you did too!

-Jimmy

#so you think you can cook!


So you think you can cook?

Posted by Jimmy | | Posted on 2:42 PM

6

My cousin and I came up with an idea to have a competition of sorts.   We're going to take turns choosing a universal ingredient to cook with.  She will make a sweet application to the ingredient and I will make a savory application for it.  We'll choose an ingredient on the 15th of the month and post the blog sometime in the first week of the next month.

Our little competition is open to anyone.  Unfortunately, there is no prize but think of it as a way to show your creativity.  My cousin and I will both post any pictures that you take of your food.  There is no money involved and no entry required other than telling us you wish to participate.  We'll start off with some fairly easy ingredients then we'll progress to some harder ones.

Happy Cooking!


Allez Cuisine!

-Jimmy

But moooooommmm... I need to Pio Pio!!!

Posted by Jimmy | | Posted on 10:02 PM

3

So I'm back from NY and I have so many stories.  I can't fit it all in one blog.  In fact, I think you'd have to meet up with me to hear them all!  So give me a call and hang out with me!   What??  O.k. Here's one food story for you!  
My first weekend in NY my cousin Lillian who is the mastermind behind Sweets By Sillianah invited me along to meet a few of her Foodie friends in NY.  I met a married couple Andrea and Jeff who blog on High Low Food Drink, I also met Justin who owns Just Cook NYC and Hazel who blogs on Tasty Pursuits.  

I've never meet an online foodie in real life before.  Sure, I've met people online during my MMORPG days, but this is different.  We actually have something other than video games to talk about!  FOOD!!  We went to Pio Pio and they had this delicious Peruvian Roasted Chicken with a creamy green sauce that tasted spicy, salty and so fresh!   There were so many discussions going on around the table, but the one thing that kept popping up was.  What's in this green sauce? 

On the train ride home, i told my cousin that I think I can duplicate the sauce and she challenged me to do it.   So I figured, Let's just look to see if it's online first.   There were some versions of it and some of them looked good while others didn't.   Some post a chimichurri as the "light green sauce", WRONG COUNTRY PEOPLE, while others were just baffled.    I found one that looked fairly close and I tried it.  My recipe is an adaptation from a lady at Serious Eats

The first challenge was to find the Aji Amarillo and the Cotija cheese.  It's a pepper indigenous to Peru and the cheese is in every Mexican market there is.   So off I went to the local Mexican supermarket to see if they had it.  I love the Mexican market.  Their produce is at large and in charge!  Look at the size of the jalapeno and Roma tomato!!  (I have big hands)

I'm used to Safeway(fresh and expensive) and Chinese(cheap and sometimes not so fresh) supermarkets so the Mexican market is somewhere in between.  Fairly fresh produce for fairly cheap prices.  One thing you need to understand is, I love food shopping. I wander around the Mexican market like I'm in another country. I was all starry eyed as I was feeling, touching, smelling everything in the market.   I got so involved in food shopping that I missed my golf tee time!!!
Here's a picture of the Peppers and the Cheese:

Here's My Recipe:
  • 1 Large jalapeƱo, including seeds and ribs
  • 1 whole Aji Amarillo Pepper (the store didn't have paste)
  • 10 sprigs cilantro leaves and stems, roughly chopped
  • 2 tablespoons cotija cheese 
  • 2 medium garlic cloves 
  • 1 tablespoon vegetable oil
  • 1/2 teaspoon white vinegar
  • 1/2 teaspoon salt
  • Squeeze of Meyer Lemon (I forgot to buy limes =( )
  • 1/2 cup mayonnaise

Mix everything in a blender except the mayo and blend the crap out of it.  If it's not blending well, add more vegetable oil.  Once it's fairly smooth add the mayo and blend the crap out of it again until you have a smooth texture.
I must say that this recipe comes pretty close to what I tasted.  I know, I know  Jalapenos and Cotija isn't Peruvian, it's Mexican, but it's not a bad substitute.  Is it exactly like Pio Pio's?  No!  I would have to have the two sauces side by side to decide that.  
 
It tasted so good though, I decided to make a steak sandwich and pan sear some chicken on the spot to eat with it.  Can you say, "Food Coma?" 

Chuck Steak Sandwich with Cilantro,
Roma tomatoes and lettuce


Pan seared chicken breast with
Peruvian green sauce


Thanks for reading - Jimmy

I'm such a slacker!!

Posted by Jimmy | | Posted on 10:39 PM

1

I know I've been slacking i my posting as of late.   I've been neglecting my wonderful fans.  (all 7 of you.  There's not many of you and that makes you all more precious!) 
Anyways this post is just an update about what i've been doing and what I'm going to do.   I've been doing some gardening as of late so I have some fresh veggies and fruits to work with.  That has taken most of my time.  I started 2 types of home based business.  Pampered Chef and I'm also in the healthy chocolate business!  I lost 10 lbs so far eating chocolate can you believe that? 

And .....   I'm going to NY!  I will be gone for 12 days.  You can see all the wonderful food and activities on my facebook acocunt!  I'll keep updated there!


Until Then, I wish you all the best!

-Jimmy


Mr. Owl, how many ....

Posted by Jimmy | | Posted on 10:30 PM

1

... times does it take Jimmy to get making mozzarella cheese right? 

The answer is ... One..... Two ..... THREE!!!  Yep, That's right it took me three times to get it right.     After failing at my hand pulled noodles, I wasn't about to post another failure!  I had to get this right!

I fell in love with buffalo mozzarella ever since I worked in on the line at Rainforest Cafe back in 1999.  It has such an amazingly soft texture and the taste is so pure and milky that if you haven't tried it before, you should. 

Since I don't have any buffalo to milk in my backyard, I had to settle for cows milk.  My first try was with store bought whole milk.  Pasteurized and Homogenized.  When I failed using that milk, I scoured the Internet for reasons why I failed.  Some blogs stated that the Homogenization process deprives milk of natural calcium content, that I should add some calcium chloride or use raw milk.  The cheese came out to be a little like glorified cream cheese. 

I wasn't about to use calcium chloride (that just doesnt' sound tasty to me) so I went in search of Raw Milk.  It is IMPOSSIBLE to find.  I did a search on google for where I could find raw milk in the East Bay area.  I got a few hits at natural food stores and then I saw that Whole foods carries a brand from Straus Family Creamer can be used.  I'm sorry but I don't remember the websites that i used my research in.  Straus has a pasteurized un-homogenized milk for $4.39 per half gallon at whole foods.   I figured it'd be worth it especially if I succeeded.

So, here comes the 2nd try.  I thought I did fine with making of the curds but it wasn't like how people explained.  The curds should look like soft tofu when mine looked like stringy ricotta.   Well, the second batch looked like it was stretching and I tried to incorporate the first batch with the 2nd batch.   WRONG!  It became one huge mush.  I tried to add more acid to coagulate the curds a bit.  It became so broken up that I KNEW I absolutely failed there.  2 batches down the drain.

I wondered, What am I doing wrong?  Why doesn't my curd look like the videos that I'm seeing? Well partly because one of the recipes I was following told me the rennet would take 5 minutes to set. I got impatient and thought my rennet wasn't working. So I added more and more acid. Turns out all I had to do was wait 40 minutes not 5!  The video below helped me the most.  Take a look at it.  

Okay!  Enough Talking!

My Third try was a success!!!!You can see my curds look like soft tofu! The Video helped me heat and work the cheese too.  Here is the recipe.

1 gallon of pasteurized un-homogenized milk
1 1/2 Tsp of Citric Acid Mixed with 1 cup of un-chlorinated water
1/4 Rennet Tablet  Mixed with 1/4 cup of un-chlorinated water
1 bottled water.  (for my un-chlorinated water
sea salt to taste.

In a 5 Quart Heavy Bottom pot mix the milk and the acid and slowly bring it up to 90 degrees Fahrenheit.  I used a meat thermometer hanging from one of those binder clips.  (multi-tasking at it's best, Alton Brown would be proud)  When the mixture reaches 90 degrees add the rennet solution and gently stir to get it incorporated.  DO NOT over mix.  Mix once or twice then take it off the heat, cover and let it sit.  Wait 40 minutes and you''ll get a solid custard like curd.  Cut the curd into 1/2 inch cube as best you can.  stir and break up the curd some and you can remove the curd and let the whey drain out. 

Put the curds in a microwave safe bowl and set it on high for about 1 minute.  Drain the the liquid, mix with a spoon and put it back into the microwave for 30 seconds.  You'll continue to do this 2 more times for 30 seconds in the microwave until the cheese becomes almost too hot to touch.  Once you can stretch and knead the mozzarella you'll see that it'll go from being grainy to being glossy and smooth add your salt to incorporate it in.  Congratulations you have mozzarella!

I suggest eating it warm.  If you put it in the refrigerator it's not as tasty.  Use it for pizza, it will be delicious. 

I'll leave you with the two videos that helped me the most.  Hopefully it'll save you guys some heartache.  I will be perfecting my technique.  This isn't the last of me!


The first Video helped me make the mozzarella.  The second video I got the idea for tying it.  Good luck, have fun and don't give up!  - Jimmy


Hand Pulled Noodles Pt. 1

Posted by Jimmy | | Posted on 1:13 PM

4

I was so excited to try hand pulled noodles for the very first time!!! I never made noodles before and I have always wanted to.  Hand pulled noodles have a great bite and chew to it that can only be achieved by making them by hand.  So I used a recipe by this guy.  Yep, it's the same recipe adapted by Tiny Urban Kitchen

I thought I had followed the recipe perfectly. I weighed all the ingredients, mixed them together and started kneading.

The kneading process by hand took me almost 2 hours worth to even get it somewhat stretchy I had to keep adding little bits of water so I could get it to stretch right.  It kept drying out but the dough looked good.  When I tried to make the noodles, it always would break and there would be some fat parts to my noodle.

So I made them into little noodles one strand at a time and decided to boil them.  They  did not come out good at all.  It's hard to describe the texture since at this time I was crying in the corner at my countless hours wasted working my forearm muscles.  Needless to say, my first attempt at hand pulled noodles was an EPIC FAIL!   I was such a sad panda =(

It's a good thing I had made a Dragon Fruit Sorbet on Monday.  I went to the freezer with my best pouty face and scooped myself a large helping of Sorbet.  You can't feel bad if you have a frozen treat in front of you.

So, I leave you with this recipe:

Dragon Fruit Sorbet:
3 Ripe Dragon Fruit (halved)
3/4 Cup of Water
1/4 Cup Sugar
2 Tbsp Meyer Lemon Juice (about 1 lemon)

Take a spoon and scoop out the inside of the Dragon Fruit.  Reserve the skin by placing in a bag and freezing it to use as bowls.  Put everything inside a blender or a food processor.  Blend till smooth and  place the mixture in an ice cream maker.  Mix for up to 30 minutes till you get a slushy consistency and put it inside the freezer to let it set.

Should take about 4 hours to set fully.


Let me go cry in a corner now!
-Jimmy

Asian Pulled Pork Sandwich

Posted by Jimmy | | Posted on 12:35 PM

2

This past weekend I decided to try  my hand at smoking.  Let me start off by saying this is my first time smoking anything AND my first time making this dish from scratch with no real recipe to pull from.  I searched and searched for an Asian pulled pork sandwich recipe and I didn't find anyone that suited what i was looking for.

I have, however, watched countless hours of food shows about smoking and I might have even pulled the coleslaw recipe from a show I've seen but I can't be too sure.  I made so many mistakes this first time around but the result was actually pretty tasty as a few people can attest to.  So, without further adieu, here are my adventures!

I got myself 5lbs of pork.  This was a mistake!  I went to Smart and Final (think a smaller version of Costco) and all they had was Sirloin.  So I figured I'd give it a try.  The Sirloin is way too lean and requires a REALLY long time to get to a decent consistency for food.  Definitely get a butt if you want to smoke.

I got some Hickory wood chips from Home Depot and soaked it for 30 minutes before getting them started.

I then started with a dry rub.   I don't have ratios (super top secret recipe) but here are my ingredients:
Garlic powder
Onion Powder
Paprika
Cayenne Pepper
Chinese Five Spice
Salt
Pepper


Rub the mix onto pork 1 hour before smoking.   I have a Charbroil Red grill.  It's a gas grill that uses a U Shaped bin to amplify the heat.  It was a perfect place to put the wood chips for smoking.  It has 3 Gas controls so you can shut them off and on f your smoke is too hot or too cold.


I placed a water bath underneath my pork and placed the pork on the top rack and smoked for 2 hours trying to keep the temperature as close to 225 as possible at all times.  One small bag of chips was only enough for 2 hours of smoking.   One thing about the grill I chose is, the hole has vents to let the smoke out.  So, I had to cover the holes with Aluminum foil and duct tape.  

Since I had such a lean cut of meat, the 2 hours of smoking wasn't nearly enough.  I stuck the pork in the oven with Coke as the braising liquid.  Filled the pan up 2 inches of coke, Seal Tightly and braise at 225 degrees in the oven.  After two hours I took it out and it was shred-able but not tender enough to eat as a pulled pork sandwich.  

The picture on the left you can see the pink ring on the outside of the pork.  That's the smoke ring that serious BBQ'ers love to see.  After shredding I stuck it back in the oven with the braising liquid covering the meat for another 2 hours.  6 hours of cooking total and the meat came out perfect!  The cola gave the meat a nice amount of sweetness to it.  

I then mixed the pork with an Asian BBQ sauce that I concocted and topped with a honey-wasabi coleslaw.  My first variation of the coleslaw had wayyyy too much wasabi.  But wow! does it clear your sinuses.  

Here is the recipes I ended up with - 
Asian BBQ Sauce:                        Honey-Wasabi Dressing:
1/4 Cup Ketchup                           1/2 Cup Mayo
1/2 Cup Hoisin Sauce                     1/4 Cup Honey
1/4 Cup Rice Vinegar                      1 Tsp Wasabi Powder
2 Tbsp Brown Sugar                       2 Tbsp Yellow Mustard
                                                  1 Tbsp Toasted Sesame Seeds

Mix the ingrediants of the BBQ sauce together and set aside.   For the honey-wasabi dressing mix the wasabi powder and the yellow mustard and let it sit and bloom for a few minutes.  Then mix together the rest of the ingredients and set aside till you're ready to mix it into the slaw mix. 

Layer the slaw on the bottom of the bun, add about 4oz of meat on top and top with toasted sesame seeds and sriracha if you like it spicy.  

Hope you give smoking a try or make an Asian Pulled Pork Sandwich.  It was very tasty even with all the speed bumps.  

-Jimmy


"In Napoli where love is king...

Posted by Jimmy | | Posted on 12:36 PM

1

... When boy meets girl here's what they say, When the moon hits your eye like a big pizza pie, That's amore!"

I've always loved Italian culture.  Sometimes I dream that I'm part of the Godfather movies or on the Sopranos.  Not one of the gangsters, especially not one that gets killed, but at the table where everyone is feasting! 

I have these insane cravings for Italian food.  Pastas, pizzas or whatever!  Being a New Yorker in the middle of California Land, I find it real hard to find a good thin crust pizza out here.  There are some good pizza places but a lot of them are $15 for a 12" pie (BTW they don't call it a pie out here.  It's just "pizza". MADNESS!) So, I decided to make my own.

I scoured the Internet for a good pizza dough and sauce recipe and here's are my results!

First, I started with the Pizza dough. The dough took me a few tries to get right.  The recipe that I found wasn't quite right so I had to tweak it. Adapted from here.

Ingredients:
4 1/2 cups of all purpose flour
1 1/2 cup of warm water
2 1/2 tsp sugar
2 1/2 tsp salt
1/2 tsp active dry yeast
1 tbsp extra virgin olive oil

Add the water (about 90-105 degrees Fahrenheit), sugar and yeast together in a large mixing bowl and stir.  Let the mixture sit for 5-10 minutes for the yeast to activate.  (if you use instant yeast you can skip this step but you still need the same amount of water)  The mixture may start to foam, don't panic!  And if it doesn't, Don't panic either! As long as your yeast is fresh, it will work.  If your yeast is over 2 years old, buy new yeast.

After 10 minutes, mix in the rest of the ingredients and stir with a heavy spoon.  As the dough comes together, you'll see that you can start to work it with your hands.  If the dough sticks to your hands add more flour.  The dough should be soft and easy to work with.  Knead the dough for 10-12 minutes.   Split the dough into 3 small balls and place them in oiled bowls and cover.  Refrigerate if using the dough the next day or leave it at room temperature for 2 hours to bloom.  Your dough should double in size.  If it doesn't your yeast wasn't activated properly or you need new yeast.   This recipe makes enough for 3 12" pizzas.

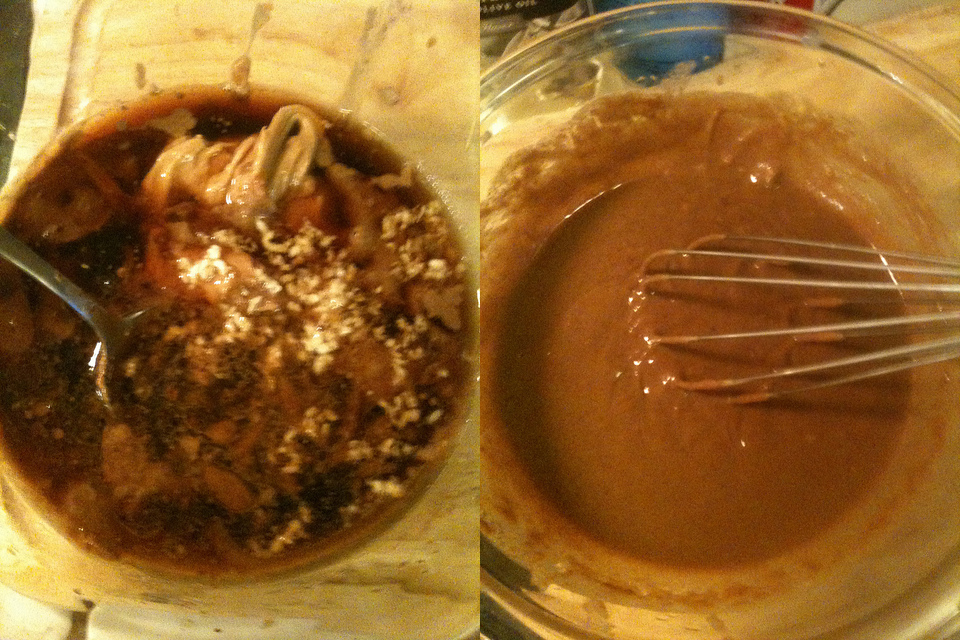
Next, I made the sauce.  The sauce I found was very easy and didn't need much tweaking.  Recipe I found here.

Ingredients:
1 28 oz can of whole peeled tomato
3 large sprigs of basil
2 cloves of garlic
pinch of red pepper flake
1 tbsp extra virgin olive oil
1 tbsp butter
1 medium onion peeled and quartered
1 tsp sugar
salt and pepper to taste

Start by burr mixing your tomatoes into a sauce.  You can leave it chunky depending on how you like it.  Add the oil and butter in a pot and start over medium high heat.  When the butter is melted add your garlic, onion and spices and cook for 3 minutes.  Be careful not to burn the garlic.  Add the tomatoes, basil salt and pepper.  When the mixture starts to bubble, reduce the heat to the lowest setting and let it reduce.  Cook for 30 minutes to an hour. Afterwards burr mix the whole thing.  Add more salt, pepper or sugar to taste.  If you don't have a hand mixer you can use a blender.  Be careful when blending hot liquids as it can splatter and explode on you if you don't let the steam out.

Time to build!!!

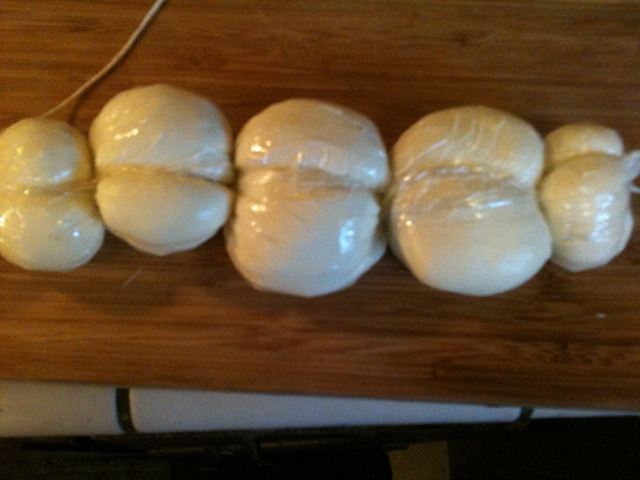
Form your dough to as thin as you can get it.   Flour a pizza peel or cutting board and place the dough. Spoon sauce over the top of the pizza and add your toppings.  I kept it simple with fresh mozzarella and fresh basil.  You can add extra spices if you wish, Italian seasoning, garlic powder, onion powder or whatever you like.

To cook, I preheated the oven for 500 degrees for 30 minutes to get my pizza stone nice and hot. If you don't  have a pizza stone you need to get one.  You CANNOT make good pizza without it. You can get one from pampered chef.  Here is a link.

Carefully slide your pizza onto the stone and lower the heat to 400 degrees. Bake for 10-12 minutes.Viola!  You'll have a deliciously crispy thin crust pizza.


Make this on your first date and I guarantee you, love will be in the air!

Buon appetito! -Jimmy


6 Minute Perfection!

Posted by Jimmy | | Posted on 8:42 PM

0

I've been going on about cooking eggs and what's the proper way to cook them.  I stated about how the 6 minute egg is my favorite way to eat a boiled egg.  It is absolutely delicious when cooked right.  The yolk is runny and the white is firm. 

I've had a few people come up to me and say that their eggs cracked when they put the egg in the boiling water.  I normally start off with room temperature eggs but if you're like any normal person, you keep your eggs in the refrigerator and that can cause cracking in the egg when you drop it into boiling water.  The egg shell can't take the differences in pressure that's going on inside the egg.

So, I searched for a solution to the problem and a few people had mentioned that you can poke a hole in the shell on the larger end of the egg (normally where there's an egg pocket).  Keep in mind you do not want to poke a hole in the egg and start with cold water.  Your egg white will run out into the water.   
               

I took a hammer and a nail and proceeded to poke holes in the eggs using the egg carton as a holder.  I was trying not to poke a hole in the membrane so the egg white wouldn't run out but as it turns out it didn't matter too much .

Once the holes were punched I put them into boiling water.  You can't really see it in the picture but one of the eggs had egg white running out.  When you use boiling water the egg white will cook fast enough so not alot of egg white will leak out. 

As soon as you put the egg in the water, start your timer for 6 minutes.   Once your 6 minutes is up immediately take the eggs out of the water and put them in an ice bath.  This will allow that pesky white membrane to seize up and make the eggs easier to peel. 

The final product is a perfectly cooked egg.  Below is the one egg that ran out and you can see that the egg white running out didn't make much of a difference.  Try a 6 minute egg tonight and eat it with some butter toast and jam or straight into your mouth with a little bit of sea salt!  Delicious!


Liang Mian (Taiwanese Cold Noodles)

Posted by Jimmy | | Posted on 9:55 PM

6

Today, I decided to dig down into my Taiwanese roots and cook a Liang Mian.  Liang Mian is a noodle dish served cold.  Since it's a cold dish, it's great for picnics on a warm summer day. 

If you love sesame and peanut butter, you'll love this deliciously refreshing dish that walks the line of sweet and salty while giving you the crunch of fresh vegetables.


Here's what I used:
1/4 cup Sesame Paste
2 Tbsp Peanut Butter
2 Tsp Sesame Oil
2 Tbsp Rice Vinegar
1/4 cup Chicken Broth
1/4 cup Soy Sauce
2 Cloves of Crushed Garlic
2 Tbsp Sugar

1 16 oz package of fresh Shanghai noodles 
1 Cucumber
1 Carrot
Toasted Sesame Seeds for Garnish

Combine the first 8 ingredients and mix well for the sauce. 

Cook the fresh noodles for about 6 minutes and immediately shock in ice water to stop cooking.

I then took my julienne peeler that I got from Pampered Chef and began working on the cucumber and carrots.  The peeler worked beautifully as I got cucumber and carrot "noodles".  
Mix 4 tablespoons of sauce with 4 oz of noodles and pile on a plate.  Top with the cucumber and carrot "noodles" and sprinkle with toasted sesame seeds.

One thing I love about Liang Mian is that it serves as a great main dish or a side dish.  Pair it with Grilled shrimp, chicken or steak.  You can even scramble an egg to top it with.

I really hope you try this recipe.  Especially  if you love Asian flavors and want something quick and simple.  The Sesame and Peanut flavors with the chew of the Al Dente Noodle and the crunch of the fresh veggies really is delicious. -Jimmy